Top Tips For Planting Spring Bulbs
.png)
Spring may seem a long time away now as we still have lots to do in our garden in order to wind it down for the Winter season, however getting prepared early will benefit you when Spring eventually does come around. If you are looking to fill your garden with bursts of colour next Spring, now is the time to start planting bulbs before the frost arrives. Any time between October and early December is the ideal time to start planting bulbs. Daffodils, Tulips and Crocus are just some of the beautiful plants to choose from.
Buying The Bulbs
Most Spring bulbs have a dormant period throughout the majority of the year meaning they need little attention. It is important when you come to select your bulbs that you choose only the freshest bulbs, this will ensure you have a successful display. Stay clear of bulbs that have become a little soft or shrivelled and opt for the ones that are firm and strong.
After purchasing your bulbs aim to plant them within a few weeks or you run the risk of them sprouting. Check that the bulbs have come from a reliable supplier and have not been collected from public land.
Choosing Where To Plant Your Bulbs
When choosing your bulbs you should consider location and soil type. Some hardy bulbs originate from warmer climates therefore require lots of sunlight and free draining soil. Access to lots of sunlight and good drainage is essential as some bulbs will rot when in their dormancy stage.
Herbaceous Borders:
Planting your Spring bulbs in a herbaceous border will help to fill gaps and provide lots of colour. Your bulbs offer a great start to your Spring garden as they will flower before perennials and shrubs therefore providing some structure to your landscape. You can choose to select single species if you are looking for a border that blends seamlessly with your current garden design. However if you are looking to create a striking look within your landscape try mixing a variety of species therefore creating a burst of colour in your garden.
Flower Beds:
If you plant a group of Spring flowering bulbs together they can make a stunning contribution to your garden beds. You should try and grow groups of early flowering bulbs in your garden bed to add structure to your garden. Generally the larger the flower the more suited they are for formal flower beds. At Gravelmaster we supply Problend beds and borders topsoil which has been designed to promote the early development of plants.
Your Garden:
Spring flowering bulbs are often seen at the base of trees these are wonderful and can instantly add colour and brightness to your garden. The soil beneath the trees is moist and light providing ideal growing conditions for these flowers. Plants such as crocus’, scillas and anemones are perfect for growing beneath trees.
Spring bulbs can also transform your lawn and look beautiful dotted around your landscape. Bulbs such as daffodils, snowdrops and eranthis hyemalis will inject instant colour into your garden. If you are after a natural look the trick is to throw the bulbs in the air and plant them wherever they land. Ideally you want these plants to look as unstructured as possible. When the flowering period is over allow the plants to fully die down before you come to mow the lawn.
Pots and Containers:
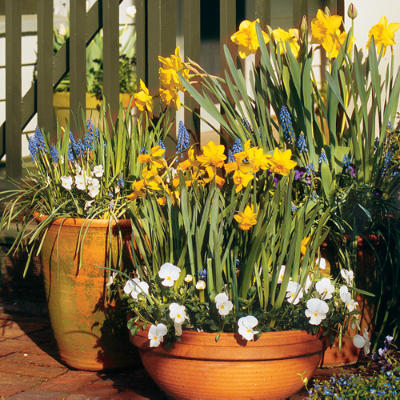
If you have limited garden space or if you are an urban gardener pots and containers allow you to create a wonderful Spring display. Aim to keep it as simple as possible by planting the same variety this will ensure that you get a burst of colour on your balcony or patio. It can be tricky if you plant several different varieties as they are not guaranteed to flower at the same time.
How To Plant The Bulbs
Beds and Borders:
· Bulbs require two things in order to successfully grow; sunlight and well-drained soil.
· When planting bulbs in the ground aim to plant them 3 times their own depth and 2 bulb widths apart giving them plenty of space.
· When planting the bulb make sure it is facing upwards, this is extremely important if you are unsure which way is facing upwards plant the bulb on its side.
· After planting replace the soil and get rid of any large lumps, ensure there are no air spaces.
In Your Lawn:
· Take a handful of bulbs and drop them from around waist height
· Plant the bulbs wherever they land using a trowel or bulb planter. Bulb planters are ideal if you have hard clay soil.
· Drop the bulb into the hole you have made with its flattest side down. Crumble the soil back into the hole.
· To save time you can always plant multiple small bulbs together. Lift a large piece of turf and plant the bulbs in the soil, then replace the turf.
In Pots and Containers:
· Select a container that will complement your chosen bulbs and is also the correct size.
· If you are using a pot with a drainage hole at the bottom ensure the hole is covered
· Fill your container or pot with compost combined with horticultural grit to assist with drainage. At Gravelmaster we supply Professional Horticultural grit which is great used as a soil improver.
· Plant the bulbs in the pot
· Water regularly after planting ensuring the compost remains moist

We hope this guide has provided you with some helpful tips on how to plant your bulbs now in preparation for next Spring.


